How To Use Your Bub's Maternity Pillow™
1. How To Use: Bub's Maternity Pillow™
Collapsible content
WRITTEN INSTRUCTIONS
STEP 1: Join both pillows at a medium length.
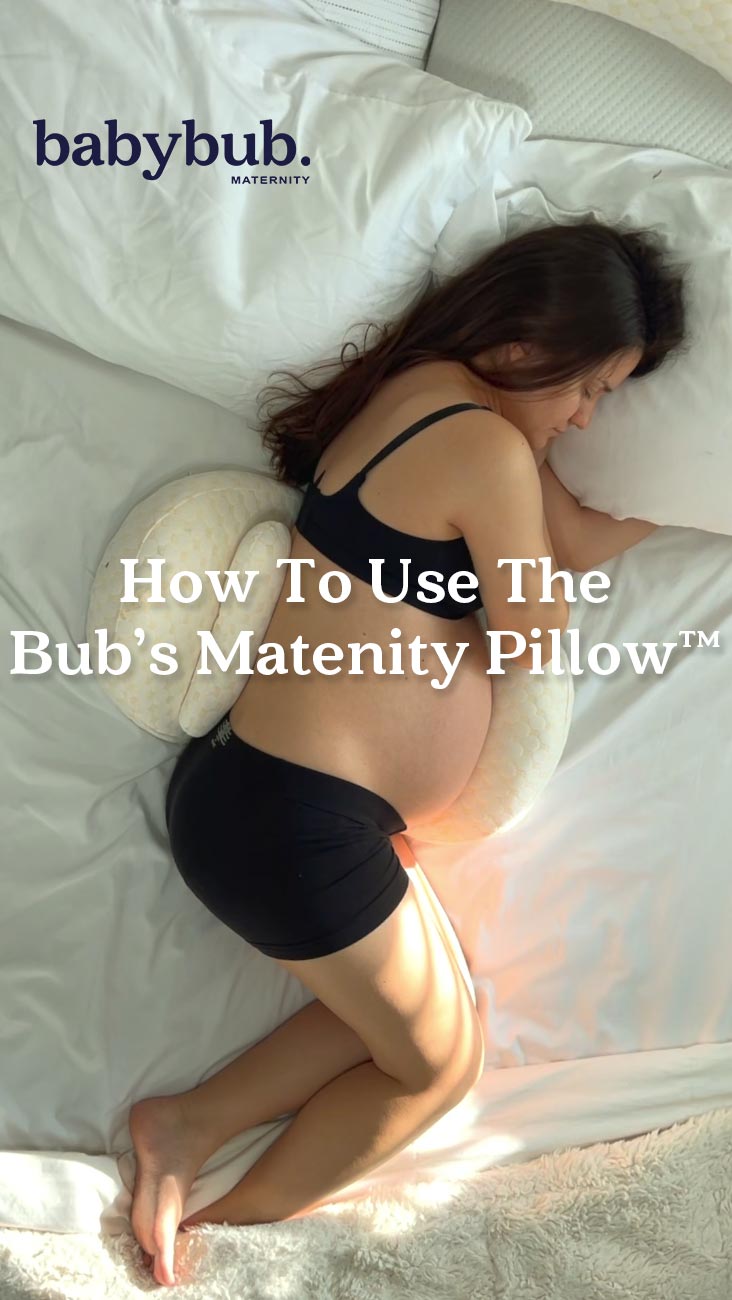
STEP 2: Place the pillow on the bed and lay sideways on it.
STEP 3: Gently wedge both pillows under your bump and back.
At the front, we recommend you start with a gentle wedge - just enough to relieve some pressure.
At the back, you may want the pillow to wedge a bit more so it stops you from rolling onto your back.
You can adjust this easily by either
a) Pulling the pillow farther front or back
b) Adjusting the length of the pillows using the adjustable strap
STEP 4: Slide the pillow higher or lower on your body to get the right support where you need it most.
Some mamas prefer the pillow to be higher on their belly, others find this to add too much pressure and prefer it lower.
The same applies to your back pillow - adjust it higher or lower until you find the support that fits you best.
Note: If your Bub's Maternity Pillow feels too firm on your back or bump, try removing a handful of stuffing and fluffing it back up before laying on it again. We recommend small adjustments at a time to find the firmness that works for your body!
STEP 5: Once you've found your perfect position and height, add the Auxiliary Pillow whichever way helps you the most:
a) BUMP SUPPORT: If you want a bit of extra support on your bump, wedge it gently between your bump and your Bub's Pillow.
b) BACK SUPPORT: If you prefer some extra support on your back to stop you from rolling over at night, wedge it gently between your back and your Bub's Pillow.
c) LEG SUPPORT: If you find comfort in cushioning your legs/knees, place the pillow straight between your inner thighs and your knees.
2. How To Use: Bub's Maternity Pillow™ + Full Body Attachment

Collapsible content
WRITTEN INSTRUCTIONS
Ways that you can youse your Full Body Attachment (FBA) to compliment your Bub's Maternity Pillow (BMP)
POSITION #1 - RIGHT SIDE LAYING
Attach it to one end of your BMP and use it as a back pillow (curving down). Extra support on your back and pelvis
Use the other half of your BMP as a knee pillow, and add the Auxiliary Pillow either as extra front or back support.
POSITION #2 - LEFT SIDE LAYING
From Position #1, roll over onto your left side to use the FBA to support your bum and cushion your legs. This is great for mamas particularly suffering from hip and pelvis discomfort.
Use the Auxlilary Pillow for extra back or bump support.
POSITION #3 - RIGHT/LEFT SIDE LAYING
Use your BMP as the main pillow in its normal configuration, and lay the FBA between your legs for the most comfortable hips, leg and knee support.
This position is ideal for mamas with consistent hip and pelvic pain.
Use the Auxiliary Pillow as extra support for your bump or back.
POSITION #4 (THE HUG) - RIGHT SIDE LAYING
Remember Position #1? Now take that configuration and rotate it 180°.
This position is great for pregnant mommas that enjoy a big cuddly hug at night, reducing pressure on your bump and shoulders by keeping your upper body supported.
Use the other half of your BMP for leg support to reduce hip pain, and your Auxiliary Pillow for extra back or bump support.
POSITION #5 - LEFT SIDE LAYING
From Position #4, roll over onto your side to keep the FBA on your back.
When the FBA is curved upward from your bottom to your upper back, you will find the most support on your back, helping ease upper and lower back pain, and keeping you from rolling onto your back (no matter how restless you may be!).
Use your Auxiliary Pillow for extra back or bump support, whichever you need most, and the other half of your BMP between your knees to relieve pressure on your hips and pelvis.
POSITION #6 - RIGHT/LEFT SIDE LAYING
You can also simply use your FBA as a big hug pillow that goes from your shoulders to your legs. This is great for a quick nap on the couch when you just want to lay down and sleep without hassles!